Configuring 2FA for Github with Microsoft Visual Studio Code Integration
If not already, at a bare minimum, you should be using 2FA (Two Factor Authentication) with all the things.
Setting up Github with 2FA using Google authenticator is simple and documented online, however setting up 2FA with Microsoft Visual Studio Code is not as straight forward.
This post details how I set up my environment to accomplish this task.
Prerequisites
- A Github account
- A Mobile Phone with Google Authenticator installed, see the link here (or search in Android/IOS app store if the link is no longer valid)
Assumptions
- Microsoft Visual Studio Code is installed
- Git for Windows is installed
- Visual Studio Code has been set as Git's default editor
- All other install options are set to the defaults
1. Setting up Github 2FA
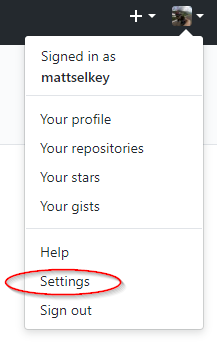
Logon to Github and go to 'Settings'
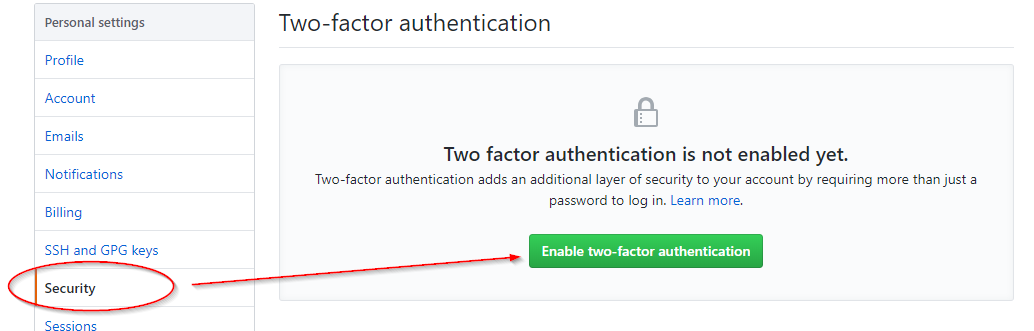
Go to 'Security' and then click on 'Enable two-factor authentication'
Next choose 'Set up using an app'

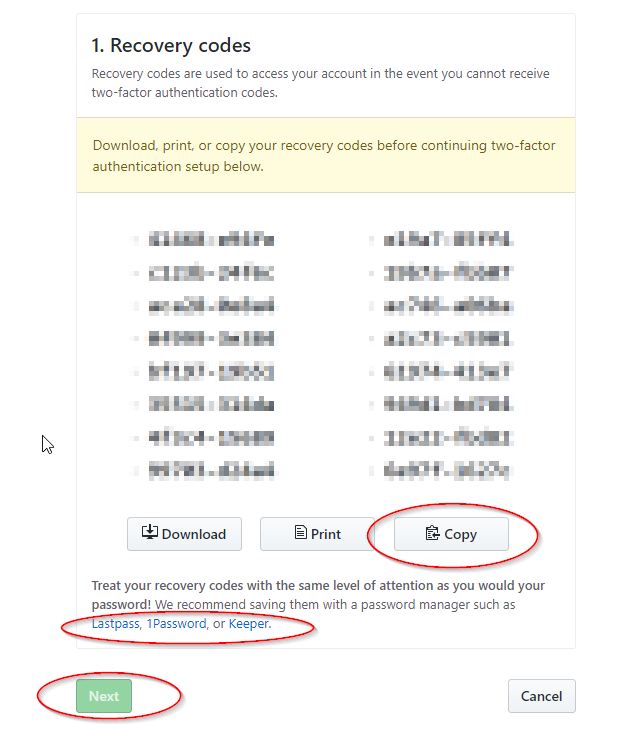
On the next screen, take a copy of the recovery codes provided. Personally I like to use a password keeper to store these, links to Lastpass, 1Password and Keeper are provided at the bottom of the page if you wish to install and use one of these (see sreenshot below). Once done, click 'Next'.
On your phone, open up Google Authenticator and scan the QR code provided on the next page. In the Authenticator app, find the new entry for Github and enter the six digit Verification code into the text field and then click on 'Enable'
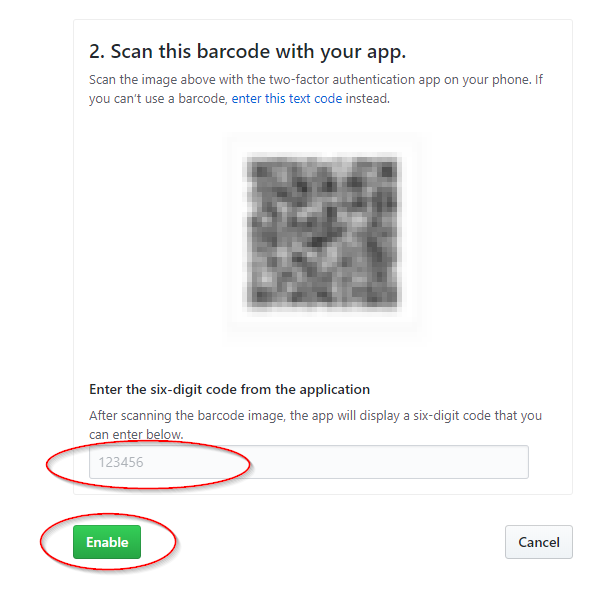
2FA is now successfully enabled, you should be prompted as shown below:

The next time you logon to Github you will be requested to enter a 6 digit Verification code from the Google Authenticator app.
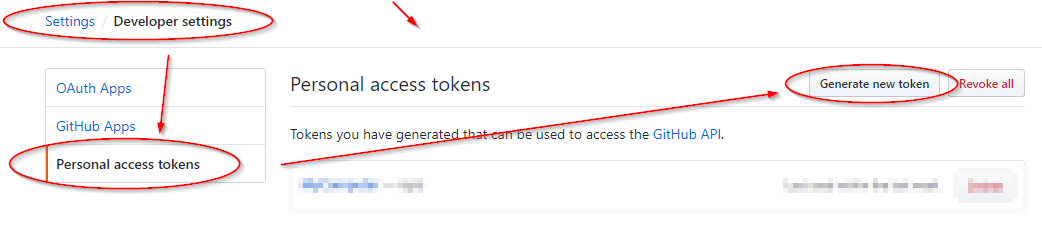
2. Create a Personal access token
To access your account from within Visual Studio Code you will first need to create a personal access token.
On Github, go to 'Developer settings' > 'Personal access tokens' > 'Generate new token', as shown below:
Enter a description for your new token in the 'Token description' text field and then select the scope as needed, for repo work the scope defined in the screenshot below with suffice.
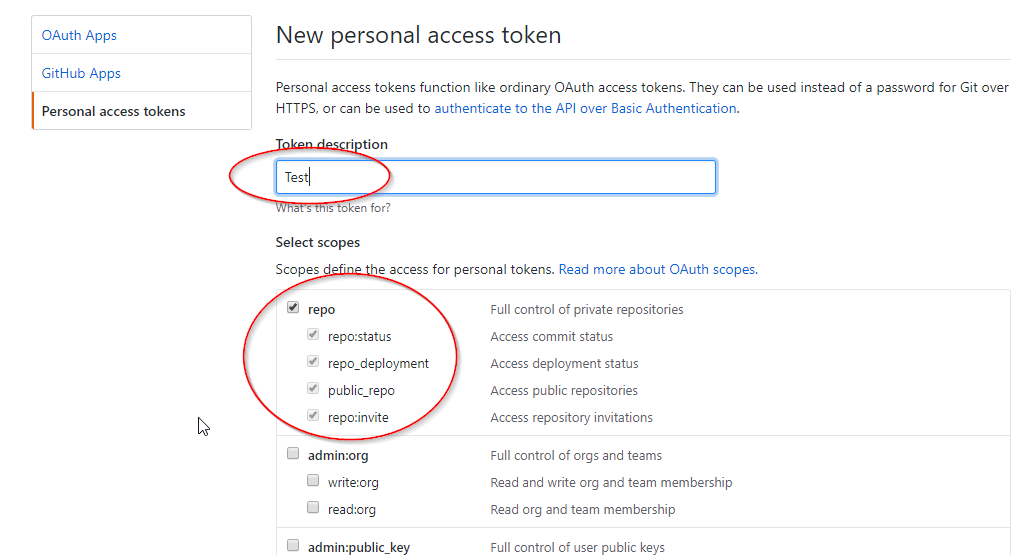
Finally click on 'Generate token'

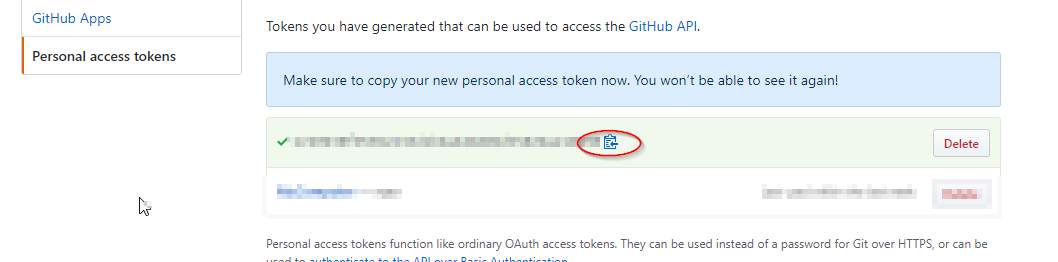
Copy the new access token and save it to your preferred password keeper.
 3. Configure Git
Ensuring Git for windows is installed then within the Visual Studio Code integrated console run the following command:
[cc lang="bash"]git config --global credential.helper wincred[/cc]
As shown in the example below:

The next time a commit is pushed to GitHub from a local repo, you will be prompted to enter your GitHub login details, as shwon below, use the personal access token as your password
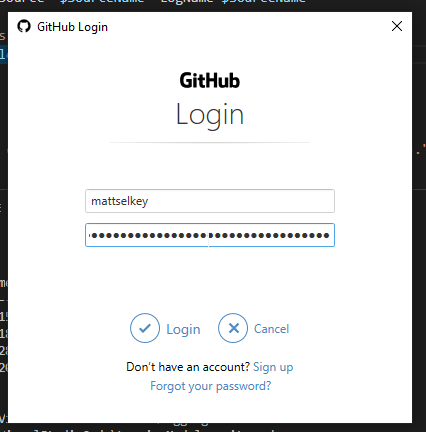
Git should now be configured with your GitHub account.
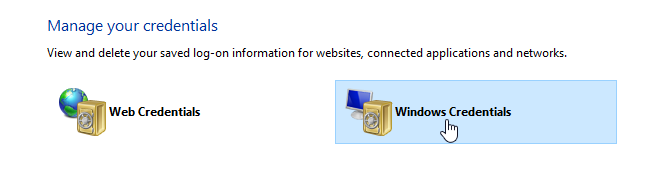
Should you need to confirm the credentials on your windows workstation, open the Credential Manager using the following command.
[cc lang="dos"]control /name Microsoft.CredentialManager[/cc]
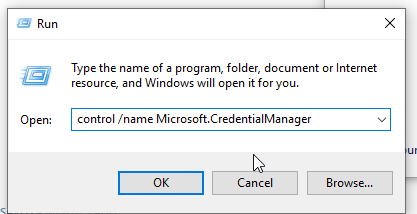
Under 'Generic Credentials' in the Windows Credentials tab you can view and remove your access token if needed.